Python Learn and Predict
The learn and predict algorithm can be added to the Python node in a few ways: it can be written or pasted into the script window; you can download an algorithm from the Pyramid Marketplace; or you can select a learn and predict script that has been saved to Pyramid's content management system.
For examples, click here.
Configure the Python Node
Script Window
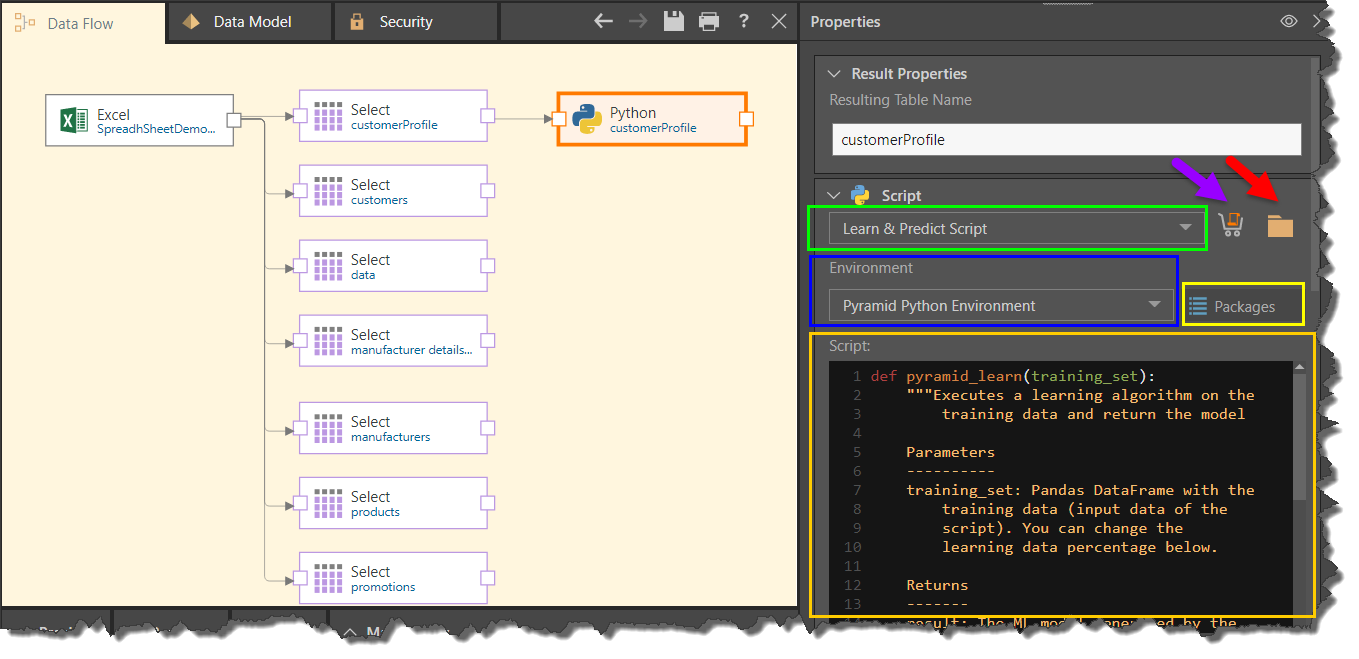
Start by selecting 'Learn & Predict Script' from the script type drop down (green highlight above).
Environment: select the relevant Python environment where you want to configure the model (blue highlight).
Packages: click the Packages button to view the packages that exist in the given environment (yellow highlight).
Marketplace: open the Marketplace (purple arrow) to download a Python learning script from the Pyramid Marketplace.
Script Files: click the folder icon (red arrow) to select a Python learning script that was saved to the Pyramid content management system.
Script Editor: write the Python learn and predict script (orange highlight). If you import a script from the Marketplace or content system, it will be added to the script editor when selected.
Scroll down below the script window to continue configuring the Python node:
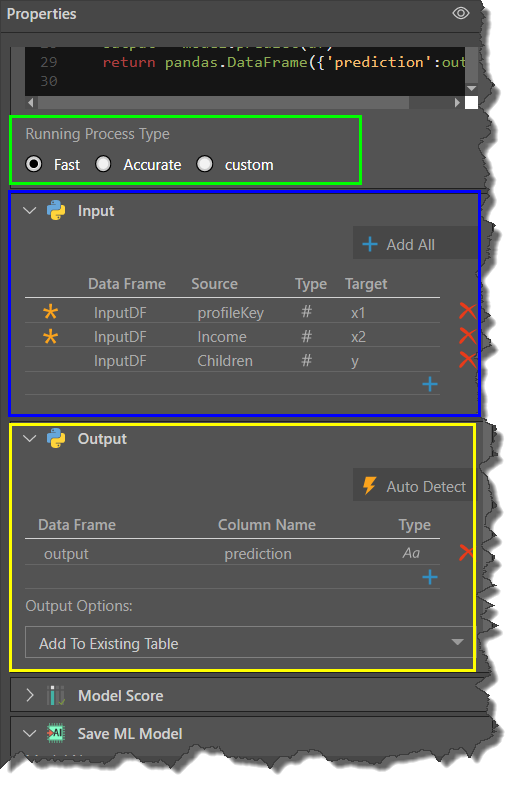
Running Process Type
This selection determines the amount of data that is used to train the algorithm (green highlight in the image above).
Fast: uses 20% of the data.
Accurate: uses 90% of the data.
Custom: enter a custom amount.
Input Window
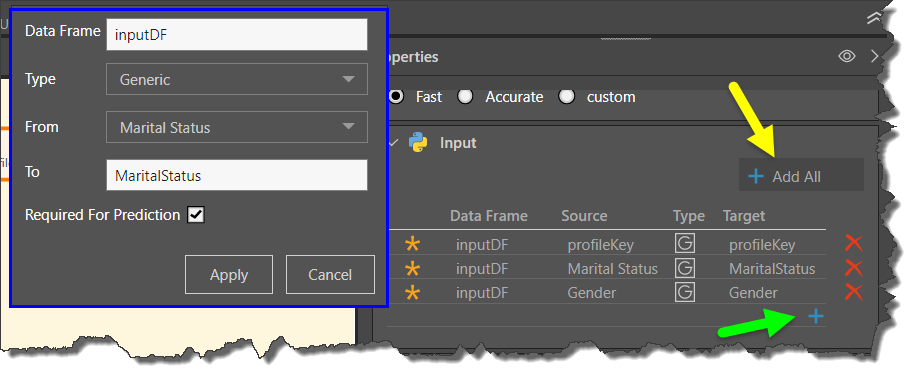
Input: lists the columns that were input into the algorithm in the learn function (blue highlight above). To add the input columns, you can add all columns from the table to which the Python node is selected (yellow arrow below), or configure each column separately using the add icon (green arrow). To edit a column, click on its listing.
When adding or editing an input column, enter the details in the flyout menu (blue highlight below).
Output Window
Output: the algorithm's output. Manually add the output columns using the add icon (green arrow below), or click Auto Detect to automatically load the output columns from the algorithm. Click on a column's listing to edit it. When editing or manually adding a column, configure it in the flyout menu (green highlight).
Output Options: choose whether the output should be added to the existing table, or used to create a new table (reg highlight).

There are more options below the Output window:
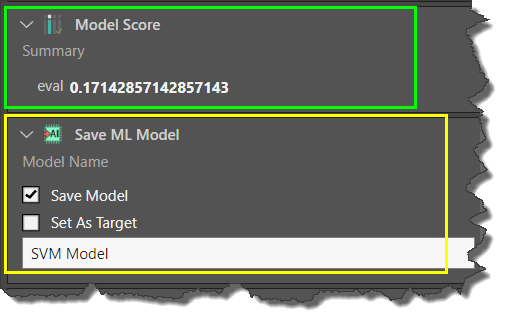
Model Score
The model score is evaluated after the algorithm has been run. The score that the algorithm assigns to the ML model, which indicates how reliable the model is (green highlight in the image above). To produce this score, the algorithm compares its predictions based on the training data with the actual data.
Save ML Model
Here you have the option to name and save the model, and to set it as a target in the ETL (yellow highlight above).
Save Model: save the algorithm output as a machine learning model (see below to learn more).
Set as Target: set the Python node as the target in the data flow (see below to learn more).
Learn and Predict Algorithm
The learn and predict algorithm must contain the following three parameters:
Learn Function
def pyramid_learn(training_set):
Write a learn function, which will take the training data (input) and return the Machine Learning model (output).
To determine the size of the training data, make a selection from the Running Process Type below the Script window.
Eval Function
def pyramid_eval(model, testing_set):
Write a Pyramid eval function. The eval function evaluates the ML model produced by the learn function against a testing set (this is not the same testing set that was used by the learn function). It returns a model score indicating the reliability of the predictions, which is displayed in the 'Model Score' panel.
The eval function may or may not contain a predict function. It is generally used for prediction and computation.
Predict Function
def pyramid_predict(model, df):
Write a predict function which will apply the ML model to the entire data set. The output of the predict function is a Pandas DataFrame with prediction results. The output may be added as columns to an existing table, or used to create a new table.
PMML Function
def pyramid_toPmml(model):
Optionally, write an export function which serializes the model to PMML format in order to use the Pyramid-trained models in other platforms. The exported PMML is available for download through the Admin console’s Data Sources tab.
Save ML Model
Save Model
Select this option to save the algorithm's output as a machine learning model. This stores the existing results and allows you to add the ML model to another data flow later on; this is useful if you want to apply the ML model to new data in the data flow. In this scenario, the algorithm will run faster because the previous results are stored. As the learn function was already run on the algorithm, only the predict function will run.
To save an ML Model, select Save Model; name the ML model in the textbox below. Save and execute the master flow.
To use the saved ML model in another data flow, go to the Scripting tab and add the Scripting Model node to the data flow; it must be connected to a data set with the same structure (columns and data types) as the data set on which it was initially run.
From the Scripting Model node's Properties panel, go to the Scripting Model window. Under Model Type, choose Python. Under Model Name, select the saved ML model.
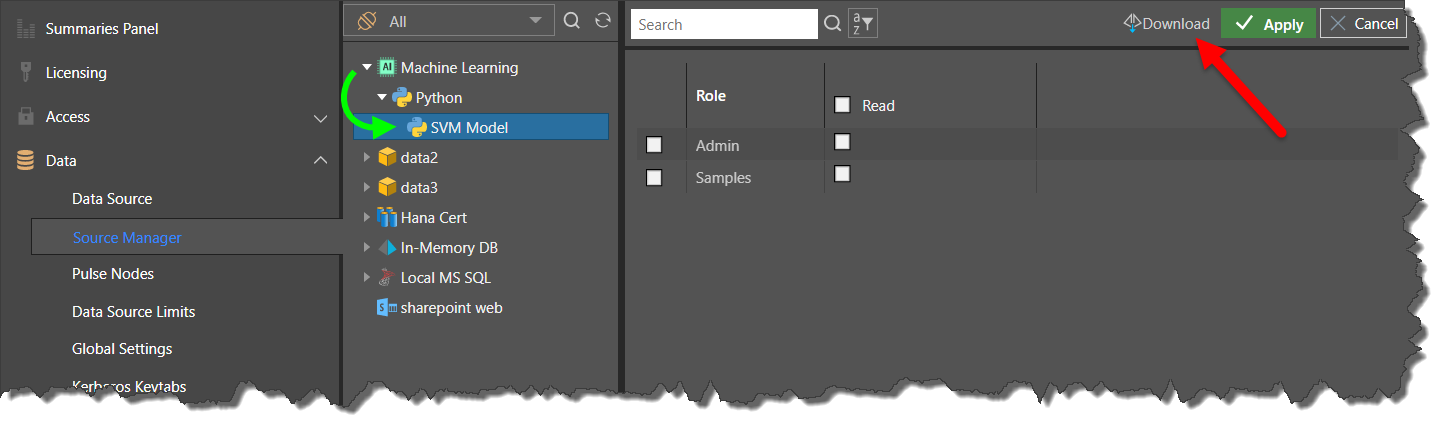
Download the Saved Model
To download the saved model, go to the Source Manager in Admin console; select the Machine Learning node from the data source tree, find the saved model (green arrow below), and click on the download button (red arrow).
In order to use the downloaded model outside of Pyramid, use the pickle package to load the data in the file as follows:
import pickle with open(path,'rb') as model_in: model = pickle.load(model_in)
Make sure that the Python environment’s packages’ versions used for the model’s training in Pyramid match the packages’ versions of the Python environment in which the model is being loaded.
Set As Target
This option is only enabled if you have selected Save Model. Choose this option to use the Python node as the target. In this scenario, the ETL data is not loaded into a database. As there's no ETL output, only the algorithm's learn and eval functions will run; the predict function will not run.
The ML model can then be connected to a different data flow, where the predict function will be run.
To use the Python node as the target, go to the Save ML Model window and select Save Model, then select Set as Target and name the model. Save and execute the master flow.
To use the saved ML model in another data flow, go to the Scripting tab and add the Scripting Model node to the data flow. The ML model can only be run if the data set has the same structure (columns and data types) as the data set on which the learn function was run.
From the Scripting Model node's Properties panel, go to the Scripting Model window. Under Model Type, choose Python. Under Model Name, select the saved ML model.